Friday, 12 May 2017

How to Restore iPhone Data with Ease?


Have you ever bumped into such a situation when you lost some important data on your iPhone, iPad or iPod Touch? I think most of you have been there and have been tortured by the mess. You might be wondering how to restore iPhone data? Hold on for a second, before moving on, let’s make it straight how data could be lost. Here are some cases when you could lose data:
  • Device gets lost, stolen or damaged
  • Fail to upgrade iOS system
  • Fail to jailbreak the iOS device
  • iOS gets crashed
  • iOS gets malicious attack by virus...


OK, no matter what causes your data loss, there is a chance to regain them. Here I will talk about 2 easy ways that may help you recover lost iPhone data: using iOS Data Recovery and using iTunes.


Solution 1: How to restore iPhone data via iOS Data Recovery

iOS Data Recovery is a professional data recovery app for iOS users. On one hand, this app is compatible with almost all iOS devices including iPhone, iPad and iPod Touch. On the other hand, it enables you to recover contacts, messages, call history, calendar, notes, voice memos, video, photos and Safari Bookmarks. And below is how to restore iPhone data using iOS Data Recovery:

1. Start iOS Data Recovery on your computer.

2. Connect iPhone to computer via USB cable.

3. Choose recovery mode: recover from iOS device.

4. Select lost data and click “Recover” to restore iPhone data.

how to restore iPhone data


Solution 2: How to restore iPhone data from an iTunes backup?

If you have made a full backup of your iPhone, you can restore iTunes backups to your iPhone any time as you want. You can follow below steps to choose a backup and sync the data to your iPhone.

1. Connect the iPhone to the computer with a USB cable.
2. Open iTunes.
3. If you have a new or erased iPhone, iTunes will prompt you to restore from backup.
4. Otherwise, Control-click on your iPhone under DEVICES in the left menu.
5. Select Restore From Backup...
6. Choose the backup you wish to sync and click the Restore button.


There are other ways that can help you restore iPhone data, for example, iCloud. And if you have any other better solutions on how to restore iPhone data, you are welcome to post your idea in the comment section.

Thursday, 11 May 2017

How to Backup iPhone without iCloud?


You might already have disturbed by the annoying pop-up notification that says “This iPhone cannot be backed up because there is not enough iCloud storage available.” If you’ve know that Apple only offers a limited free iCloud space for each ID, you won’t be surprised. But the problem is this notification keeps popping up. So how to get rid of this? There are solutions: pay monthly to get more iCloud storage or backup iPhone without iCloud.


If you are planning to upgrade your iCloud, you should make sure you understand how Apple charges you. Each iOS user are granted with 5 GB of iCloud storage for free, and this 5 GB is per ID instead of per device. That means, your iOS devices are sharing the 5 GB space if you have more than one iOS devices. In general, 5 GB is far away from sufficient for most of the users, with a video consuming up to several GB space. The charges of iCloud storage vary from 50GB to 2T.


Optionally, you can choose to backup iPhone without iCloud by transferring iPhone data to the computer. iPhone Data Transfer is the ideal tool for you. Instead of requiring you to back up everything, this iPhone data transfer app enables you to back up all data or selected files to the computer. You can transfer contacts, messages, photos, videos, music files and so on.


It is easy to use iPhone Data Transfer to backup iPhone without iCloud. And below is the step-by-step tutorials that will walk you out.


Step 1: Connect iPhone with PC

After you download and install the iPhone Data Transfer app on your computer, start the app and then you can connect your iPhone with the computer via USB data cable. Once you manage to connect the devices, you will see your phone info in the app user interface.

backup iphone without icloud


Step 2: Select Data Type

Now on the left toolbar, click to select data types that you want to back up. You can choose music, photos, contacts, messages and so on.

backup iphone without icloud - transfer to pc


Step 3: Transfer iPhone Data to PC

After you select the content you need to transfer, click “To Folder”; and when the Explorer pops up, choose an output folder on your computer and then click “OK” to transfer data. And iPhone Data Transfer will begin to backup iPhone without iCloud, but to your computer.

Wednesday, 10 May 2017

Backup iPhone to PC/iTunes/iCloud

There are many reasons that you should backup iPhone to PC. For example, you want to free up the space on your iPhone, or you need to make backup in case of losing data. And since you use your iPhone a lot, it is common to lose data on your iPhone. Below are some reasons that may lead to data loss:

  • Wrong hand or accident deletion
  • Mistaken operation on your iPhone
  • iOS crash
  • Fail to update to newer iOS version
  • Fail to jailbreak your iPhone
  • Attacked by virus


With so many uncertain factors, it is necessary for you to back up your iPhone. Below I will talk about 3 solutions that may help you back up your iPhone: backup iPhone to PC, iTunes library and iCloud.

Solution 1: Backup iPhone via iTunes

The most common way to back up iPhone is use iTunes. Before you use this solution, you should make sure that you are not going to back up unpaid data such as music and video. Apple doesn’t allow unauthorized operation in order to protect copyright. Regardless of this, iTunes is a good way for backing up iPhone. Besides, when you back up your iPhone via iTunes, you have the option to set encryption for the backup. This can protect your backup file from unauthorized access.

Note: You need to make sure the iTunes installed on your computer is the latest version.

backup iphone via itunes


Solution 2: Backup iPhone to iCloud

iCloud offers a free storage of 5 GB for each user. But you should make it clear that this free 5GB is per ID rather per device. That means if you have more than one iOS device, you will run out the free iCloud storage very soon. Once you run out the 5 GB, you will need to pay an extra amount if you want to continue backup to iCloud. Optionally, you can delete unwanted files on your iCloud to make room for new content.

backup iphone to icloud


Solution 3: Backup iPhone to PC via iOS Manager

If you don’t want to use iTunes or iCloud, you can try iOS Manager. This iOS data management app will allow you to back up and manage data on your iPhone, iPad and iPod Touch. And this app will enable you to back up unpaid music and video files, which iTunes can never will, at least for now. Once you download and install iOS Manager on your computer, you can start the app and then connect your iPhone to the computer. Once the iPhone is connected, you can select data and back them up to the computer. After you choose an output folder, you can click “Start” to backup iPhone to PC.

backup iphone to pc


Tuesday, 9 May 2017

What Are the Easy Ways to Transfer iPhone Photos to PC?


We all know that iPhone is still one of the biggest mobile phone brands, sharing a large part of market of mobile phone. Despite of the closed system, iPhone is popular among the mobile users, mostly because of the experience its camera brings to its users. Most people are taking photos with their iPhones rather than professional cameras like Canon. And as the photos increase on the iPhone, it is necessary to transfer these photos to the computer. Otherwise, the large amount of photos will take up the phone storage and thus slowing down the iPhone.


There are many ways to transfer iPhone photos to PC, and below I will share 3 methods that may help you.


Solution 1: Use iTunes

Whenever we talk about transferring data from iPhone to PC, iTunes is always the first choice because Apple tells us so. As a matter of fact, iTunes as the official app of Apple, should be your first choice if you don’t have the need to transfer unpaid music or video files off your iPhone. But if you want to transfer photos, contacts, messages, calendars or kind of that data, this method can absolutely help you.


Solution 2: Use iCloud

The second choice to transfer iPhone photos to PC should be iCloud. You can back up your iPhone to your iCloud account and then sync to your computer. But this way will require you to transfer all data on your iPhone to iCloud. We all know that iCloud offers only 5 GB of free storage for each Apple ID, so if you run out the 5 GB of iCloud storage, you are not able to transfer photos to iCloud unless you pay for it.


Solution 3: Use Email

Transferring photos from iPhone to PC via Email is another practical way. But because this method relies on network largely, it is suggested only when the total size of your photos are small. And here is how to transfer iPhone photos to PC via Email:

1. Get your iPhone connected with WIFI.

2. Launch the Email app on your iPhone and select photos to attach to the mail.

3. Select recipient as yourself and click “Send”.

4. Open your Email on PC web browser and download the attached photos.


Solution 4: Use iPhone Data Transfer

iPhone Data Transfer is ideal when you want to transfer a various data types from iPhone to the computer, despite of file size. In addition to photos, this iOS data transfer app allows you to transfer videos, music files, contacts, messages, calendars and so on. What’s more, this app allows to transfer even unpaid music and video files off your iPhone to other devices. Follow below steps and learn how to transfer iPhone photos to PC.

1. Install and launch iPhone Data Transfer

2. Connect iPhone with PC via USB cable

3. Select “Photos”

4. Click “To Folder” and choose an output folder and click “Start” to transfer iPhone photos to PC

transfer iPhone photos to PC


Monday, 8 May 2017

How to Transfer Photos from iPhone to iPhone


There are times when you need to transfer photos from iPhone to iPhone. For example, you want to upgrade your iPhone, from iPhone 6 to iPhone 7, or from iPhone 7 to the coming iPhone 8. As a matter of fact, there are various ways to transfer photos and other data. If you are planning to do that, it is good for you to unpair your Apple Watch from your previous iPhone before you set up your new device. Unpairing option of auto backup of your Apple Watch will enable you to restore it after you pair with a new iPhone.

Use Phone to Phone Transfer


Phone to Phone Transfer is professional iOS data transfer app that will enable you to transfer photos from iPhone to iPhone, or other mobile devices running iOS, Android and Symbian. In addition to photos, you can also transfer videos, songs, contacts, messages and other data. The operation is simple, you can follow below steps:

transfer photos from iPhone to iPhone

1. Install and launch Phone to Phone Transfer on your computer

2. Connect both iPhones to the computer via USB cables.

3. Select data type, i.e., photos.

4. Click “Start Copy”.


Use iTunes

Back up your old iPhone to iTunes library


1. Connect your old phone to your computer via USB.

2. Launch iTunes and make sure that you have the latest version.

3. Select your device.

4. Click “Back Up Now”.


Restore your iTunes backup to your new iPhone


1. Connect your new iPhone to the computer via USB cable.

2. Press the Home button when you see the "Hello" screen and follow steps until you see the Apps & Data screen, then tap Restore from iTunes Backup > next.

3. Launch iTunes.

4. Select your device.

5. Select the correct backup version and click “Restore Backup”.


Use iCloud


First you can back up your old iPhone to iCloud and then transfer the backup to your new iPhone. You can follow below steps:

Make an iCloud backup

1. Connect your previous device to the Internet with Wi-Fi.

2. Go to Settings > [your name] > iCloud > iCloud Backup.

3. Turn on iCloud Backup.

4. Tap “Back Up Now”.

5. Make sure your iPhone is connected to Wi-Fi during the whole process.

Restore your iCloud backup to your new iPhone

1. On your new iPhone, press the Home button once you the "Hello" screen pops up.

2. Follow the instructions to go to the Wi-Fi screen and select a Wi-Fi to get your phone connected.

3. When you see the Apps & Data screen, tap Restore from iCloud Backup > Next.

4. Sign in to iCloud with your Apple ID and password.

5. Once you are logged in, select the correct backup version and start the restoration.

Normally these methods will help you transfer photos from iPhone to another. If you have problem in transferring, please leave your comments below.

Friday, 5 May 2017

Easy Way to Retrieve Photos from iPhone

What will you do if you delete photos on your iPhone by mistake? I just went through such an unpleasant experience. And I spent quite a lot of time to make up my terrible mistake. And thank God I eventually got the solution and managed to retrieve photos from iPhone. I think I am not the only victim of losing data because of wrong hand. And I could sense the soreness in searching solutions to restore deleted photographs from iPhone.


To avoid this tragedy, the best way is to back up your iPhone regularly. Otherwise, you will be regretful. If you don't have backup of what you've lost, don't be panic, you still have the chance of getting them back by using a photo recovery app. That's how I solved the problem when I deleted my photos last time. To be honest, that really worked out for me and it was simple. Below I will show you how to use iOS Data Recovery to retrieve photos from iPhone.


Before getting started, I would like make a brief introduction of this iOS photo recovery software. For one thing, this software lets you to retrieve deleted  photos from any iPhone and iPad: iPhone 7/7 Plus/SE/6S/6S Plus/6/6 Plus/5S/5C/5/4S/4/3GS, iPad Pro, iPad Air 2/1, iPad mini 4/3/2/1, etc. For another, apart from photos, this program also enables you to recover other data such videos, audio files, contacts, messages and calendar.

1: Run iOS Data Recovery

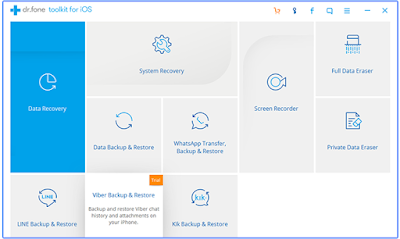
When you download the iOS Data Recovery, you can set it up on your desktop computer and run it immediately. And in the user interface, choose "Data Recovery" before you move to next step.

retrieve photos from iphone


2: Plug iPhone to PC

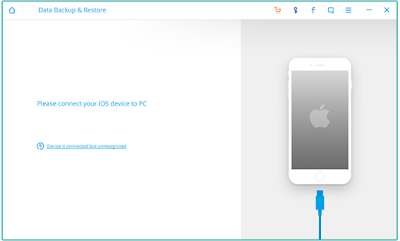
In this step, you are supposed to plug your iPhone to the computer via USB cable. And once the iPhone is connected with the computer, the iPhone photo recovery software will detect your iPhone.

retrieve photos from iphone - connect iphone to pc


3: Choose Recovery Mode

This iOS data recovery software allows you to recover deleted photos from iOS device, iTuens backup and iCloud backup. Now you should click to choose “Recover from iOS Device” and the program will start to scan through your iPhone to locate the deleted photos.

retrieve photos from iphone - choose recovery source


4: Retrieve Deleted Photos

Once iOS Data Recovery finishes scanning your iPhone, it will display all the data on your iPhone, including the deleted photos. Now you can select the deleted photos and click "Recover" to let the program to retrieve photos from iPhone.

retrieve photos from iphone - recover deleted photos


Wednesday, 3 May 2017

How Can You Fix iTunes Could not Back up the iPhone Issue?

Have you ever received the message "iTunes could not back up the iPhone because an error occurred"? If your answer is positive, you might bump into trouble. If you don’t fix it, the message will keep popping up. Actually apart from backing up iOS devices to iTunes or iCloud, you have the option to back up your iPhone, iPad or iPod Touch to PC via iTunes, just as many other iOS users do. However, Apple does not allow you to transfer everything from your iDevice to your computer or other devices. That’s why you cannot copy unpaid music or videos from your iPhone. 


itunes could not back up the iphone


Nevertheless, I am here to help and if you still can't fix the problem after following the instructions the popup dialog suggests, you can try below methods:


1. Pull out your iDevice (iPad, iPhone and iPod touch) and restart it and your computer (Mac or PC).

2. Make sure there is enough storage space on your computer.

3. Exit iTunes on your computer and then launch it and try backing up again.

4. Change the USB cable or switch to another USB port.

5. Update iTunes to the latest version.

6. Rename the backup file so it’s not conflict with the new backup.

7. Restore or erase the exiting backup on iTunes.

8. Back up iPhone to PC using iOS Data Transfer


The first 7 solutions are the regular ways most iOS users are using, and they can probably solve this iTunes could not back up the iPhone error message. If they don’t work out for you, you will need to try solution 8. Developed with intuitive interface, iOS Data Transfer can help you transfer anything from your iPhone to the computer, including unpaid music and videos. And below are the tutorials on how to back up iPhone to PC using iOS Data Transfer?


1: Run iOS Data Transfer

First you will need to download iOS Data Transfer and install it on your computer. Once the iOS data transfer app gets installed, you can run it and get into the user interface.


2: Connect iPhone & PC

In this step, you are supposed to connect your iPhone with the computer via USB data cable. And during the whole process, keep iOS Data Transfer running. And iOS Data Transfer will detect your device immediately.


3: Back up iPhone to PC


You don’t have to back up all data on your iPhone because this iOS data transfer app will allow you to transfer what you select. After you select the data, you can then click "To Folder" to choose a destination folder and export the data to your computer.


itunes could not back up the iphone


I hope this article could help if you are encountered with the "iTunes could not back up the iPhone" issue.